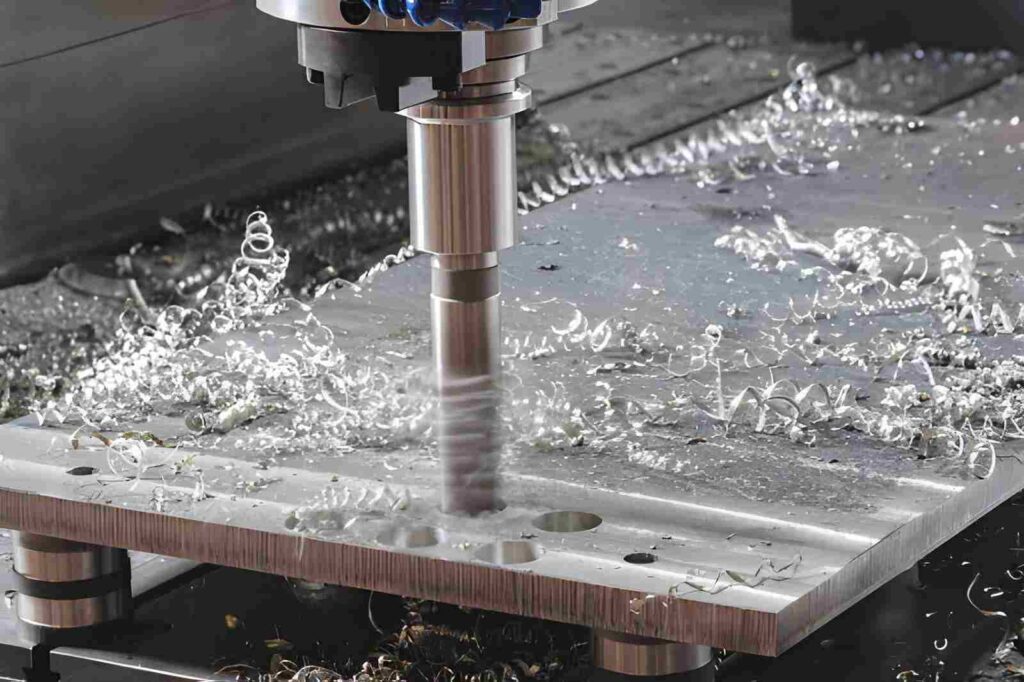
Key Takeaways
- Reaming is a finishing machining operation. It brings a drilled hole closer to its required size and improves the internal surface.
- If your part includes dowel pins, bearings, bushings, and locating features, reaming helps you achieve a better fit than CNC drilling.
- A reamer removes only a small amount of material. So, the quality of the drilled hole directly affects the final result.
- Machine reamers, chucking reamers, hand reamers, shell reamers, and adjustable reamers each serve different production requirements.
- Cutting speed, feed rate, stock allowance, tool condition, and coolant are all influencing factors in the finished hole quality.
- If your drawing demands higher accuracy than reaming alone is not sufficient to achieve, additional finishing processes such as honing and internal grinding may still be required.
You can drill a hole to the correct diameter and still struggle during assembly. A dowel pin may not slide in properly, a bearing may fit too loosely, and a bushing may require extra force during installation.
In many cases, the problem is not the drill itself. Drilled holes often contain slight size variation, tool marks, and minor out-of-roundness. These all affect the final fit.
This is why engineers add a reaming operation after drilling. Instead of removing a large amount of material, a reamer cuts a thin layer from the hole wall. This, it only refines the existing hole. It provides dimensional control, a smoother internal surface, and a more consistent fit for mating components.
If you’re designing a CNC-machined part, understanding what reaming can and cannot achieve helps you prepare better drawings and avoid unnecessary machining costs.
In this guide, we will explain:
- How the reaming process works
- Reaming vs Drilling Vs Boring Differences
- Different types of reamers
- The tolerances you can expect
- Common applications
- Factors that influence hole quality
What Is Reaming in CNC Machining?
CNC reaming is used to remove a small amount of material from the inside of a hole. It does not make a new hole, but it follows a hole that was previously drilled or bored and enlarges it toward the required diameter, while enhancing the roundness, cylindricity, and surface finish.
For instance, if the drawing calls for a hole to be drilled in a dowel pin that is 20 mm in diameter, the hole is first cut slightly smaller than its required dimension. Then, a 20 mm reamer will be used to cut a thin machining allowance to achieve the final dimensions. Only a small amount of material will be removed. This results in a significant improvement in hole quality with low cutting force.
Why Is Reaming Used & When?
Reaming is usually used when the hole dimensional quality through drilling is not optimal for assembly. Although drilling is quick, it can still produce variation in sizes, marks of the tool, and small geometric inaccuracies that can impact the mating of parts.
Reamed holes are typically found on parts such as:
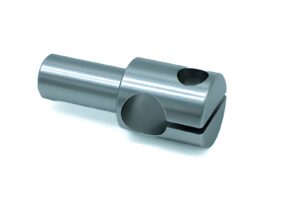
- Bearing seats
- Dowel pin holes
- Precision locating holes
- Bushing installations
- Hydraulic valve bodies
- Linear guide components
- Jig and fixture plates
Reaming Vs Drilling Vs Boring: What’s the Difference?

Drilling, boring, and reaming all machine holes, although each process serves a different purpose.
- Drilling creates the initial hole.
- Boring corrects its size and geometry
- Reaming produces the final dimensions and surface quality before assembly.
The following comparison highlights the differences between these three operations.
| Feature | Drilling | Boring | Reaming |
| Primary Objective | Create a new hole | Enlarge and correct an existing hole | Finish an existing hole to its final size |
| Starting Condition | Solid material | Existing hole | Existing drilled or bored hole |
| Typical Stock Removal | High | Medium to High | 0.10-0.50 mm on diameter* |
| Hole Size Accuracy | Moderate | High | Very High |
| Surface Finish (Ra) | 3.2 to 12.5 μm | 0.8 to 3.2 μm | 0.4 to 1.6 μm |
| Roundness Improvement | Limited | Excellent | Excellent |
| Corrects Hole Position | No | Limited correction | No |
| Corrects Hole Straightness | No | Yes | No |
| Typical Tolerance | +/- 0.10 to 0.30 mm | +/- 0.01 to 0.05 mm | H7 – H8 fits, depending on hole size |
| Tool Used | Twist drill | Boring bar | Machine or chucking reamer |
| Common Applications | Pilot holes, clearance holes, tapped holes | Bearing housings, engine cylinders, large precision bores | Bearing seats, dowel holes, bushings, locating holes |
| Production Stage | First operation | Intermediate correction | Final finishing operation |
How Is Reaming Performed in CNC Machining?
If you want a reamed hole to meet the drawing, every step before the tool enters the workpiece requires careful attention.
Since a reamer removes a little material, it follows the condition of the existing hole instead of correcting major errors.
The sequence below shows how machinists typically perform a reaming operation in a CNC shop.
Step 1: Drill the Hole First
First, make the hole slightly smaller than the final size. Do not leave any additional machining allowance for the reamer other than the recommended amount. If they drill too close, then there is very little material to cut, and the reamer becomes hot. However, excessive cutting loads and reduced tool life occur if the stock is left too thick.
Step 2: Remove Burrs and Clear the Chips
After cleaning the hole thoroughly, insert the reamer. Clear burrs around the hole entrance and blow out any remaining chips. A clean hole will help the cutting edges to enter the material uniformly and minimize the risk of scratching the finished surface.
Step 3: Mount and Check the Reamer
Use the proper reamer and check that it is in the proper position. Before starting, examine it for wear edges, chipped teeth, and runout. If the machine is programmed properly, but the reamer is damaged, it can create an oversized hole.
Step 4: Set the Cutting Conditions
Choose spindle speed, feed rate, and coolant based on the workpiece material. Normally, reaming is done at a slower cutting speed than drilling. So, don’t change feeds when the tool is in the hole.
Step 5: Ream the Hole
Push the reamer in the hole gently and evenly. Don’t push the tool through the material. A constant feed generates a surface that is cleaner and keeps the required hole size the same throughout the end-to-end dimension.
Step 6: Retract the Tool Carefully
Once the tool depth is reached, slowly and smoothly remove the tool while the spindle is still turning in the direction of the cut. This minimizes the risk of leaving marks inside the hole and will help preserve the cutting edges for the subsequent part.
Step 7: Verify the Finished Hole
Before moving the part to the next operation, inspect the hole. Depending on the drawing requirements, you may check the diameter with a plug gauge, bore gauge, micrometer, or CMM machine.
If the hole will receive a bearing, dowel pin, or bushing, a quick fit check can also confirm that the machining process produced the expected result.
What Are the Tool Types Used in Reaming?
The choice of reamer affects hole quality, chip evacuation, tool life, and machining stability. Besides the hole diameter, you should also consider the workpiece material, hole depth, whether the hole is blind or through, spindle interface, and production volume before selecting a reamer.
Straight Flute Reamer
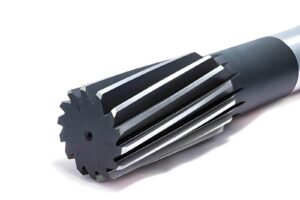
In general, straight flute reamers are commonly used for most hole finishing work. These provide good performance on through holes, as chips are allowed to run ahead of the cutting tool while being cut.
They are commonly used when machining aluminum, cast iron, brass, and low-carbon steels. Because of the symmetrical cutting edges, the cutting edges also generate good hole geometry on rigid CNC machines.
Spiral Flute Reamer
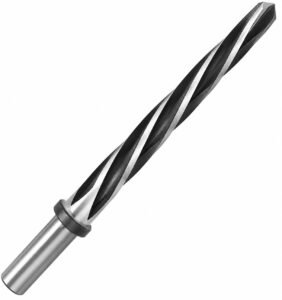
Spiral flute reamers entail helical cutting edges that help to clear chips. They are better for blind holes because the spiral will remove chips from the cutting area rather than pushing them to the bottom.
Typically, the helix angle is between 10° and 45°. However, the angle varies based on the material and cutting application.
A spiral flute reamer is often selected for the following materials and purposes:
- Stainless steel
- Alloy steel
- Titanium
- Deep holes
- Blind holes
- Left-Hand Spiral Reamer
The spiral of the left-hand reamer is opposite to the spindle rotation. The flute moves the chips ahead rather than toward the tool while machining. This design minimizes the amount of chips being cut and generates a cleaner surface in the interior of holes.
Right-Hand Spiral Reamer
Right-hand spiral reamers are used to remove the chips toward the spindle. Normally, they’re chosen for blind holes, since the chips are carried upward as the tool is fed.
This helps in the evacuation of chips in deeper holes and minimizes the chance of damaging the final surface.
Machine (Chucking) Reamer
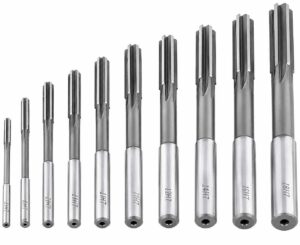
In CNC machining, the most frequently used tools are machine reamers, also known as chucking reamers. Depending on the machine setup, they are secured in a collet, hydraulic holder, shrink fit holder, milling chuck, or drill chuck.
How to Select the Right Reamer Type
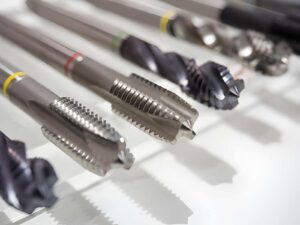
Every reamed hole has a different purpose. Some holes locate a dowel pin, while others support a bearing, guide a shaft, or improve assembly accuracy. Because of that, one reamer cannot suit every application. Start with the drawing, then match the tool to the hole requirements instead of selecting the tool first.
Look at the Hole Design First
The hole geometry usually gives the first clue. A through hole allows chips to leave the cutting area easily, while a blind hole traps chips near the bottom. This difference changes the flute design and machining approach.
As you review the drawing, check:
- Is it a through hole or a blind hole?
- What is the finished hole diameter?
- How deep is the hole?
- Is there enough clearance at the bottom of a blind hole?
Match the Reamer to the Workpiece Material
The cutting forces, chip formation, and tool wear are influenced by the workpiece material. A reamer for aluminum might not work well on stainless steel or titanium.
When using a tool for a material, review these points:
- Workpiece material
- Material hardness
- Chip formation
- The correct type of material for the reamer (HSS or carbide)
- Coolant requirement
Read the Hole Specification Carefully
The size of the hole is just one aspect of a drawing. Many components need tolerance, fit class, and surface finish requirements. These details indicate how accurately the hole needs to be manufactured and measured.
Look at the drawing and find:
- Finished Hole Diameter
- Tolerance Class (Such as H7)
- Surface Finish Requirement
- Bearing fit, Bushing, or the Dowel Pin
Think About Production Quantity
The tool type used can vary according to production volumes. For prototypes and small quantities, a standard HSS reamer is good to use. The larger the production run, the more economical carbide reamers will be suitable since they retain cutting edges for longer.
So, you must take into account:
- Prototype Quantity
- Batch Production
- Continuous Production
- Expected Tool Life
- Check the Machine Setup.
No reamer is going to help an unstable machining setup. The spindle state, tool holding, and clamping affect the hole quality.
Spending a few minutes checking the setup helps avoid unnecessary tool changes during production.
So, you need to confirm the following:
- Spindle runout
- Tool holder condition
- Workpiece clamping
- Tool overhang
- Coolant delivery
Select the Flute Style for the Application
Selecting the correct flute type makes chip evacuation easier and reduces the chance of damaging the finished hole.
| Flute Type | Typical Application |
| Straight flute | Through holes with short chip materials such as cast iron and brass |
| Right-hand spiral flute | Blind holes that require upward chip evacuation |
| Left-hand spiral flute | Through holes that push chips forward during machining |
Quick Reamer Selection Checklist
| Parameter | What to Check |
| Hole type | Through hole or blind hole |
| Hole dimensions | Diameter and depth |
| Workpiece material | Aluminum, steel, stainless steel, titanium, plastic |
| Hole specification | Tolerance, fit, and surface finish |
| Reamer material | HSS or carbide |
| Flute style | Straight or spiral |
| Production quantity | Prototype, batch, and production |
| Machine setup | Spindle, holder, clamping, coolant |
Accuracy and Surface Finish in Reaming
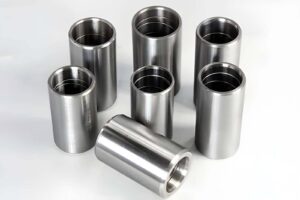
A drilled hole may measure close to the drawing size, although its internal surface and geometry can still vary from one part to another.
Once bearings, dowel pins, bushings, and precision shafts are involved, those small differences become noticeable during assembly. This is why many engineering drawings specify reaming as the final hole-finishing operation.
What Hole Accuracy Can You Expect?
Reaming is mainly used to produce a finished hole that stays within the specified size across production. Since the tool removes only a small machining allowance, it cuts more evenly around the hole than a drill.
In CNC machining, reamed holes commonly achieve +/- 0.005 mm to +/- 0.020 mm. Many standard fits such as H7 are produced with reaming before the part moves to inspection or assembly.
| Feature | Typical Value |
| Hole tolerance | ±0.005–0.020 mm |
| ISO fit classes | H7, H8 |
| Typical stock removed | 0.10–0.50 mm |
| Typical applications | Bearing bores, dowel holes, locating holes |
What Surface Finish Does Reaming Produce?
If you compare a drilled hole with a reamed hole, the difference is usually visible without magnification. Drill marks become lighter, the surface feels smoother, and mating components enter the hole more consistently.
Most production reaming operations produce a surface finish between Ra 0.4 μm and 1.6 μm. Better finishes are possible with suitable tooling, cutting fluid, and stable machining conditions.
| Machining Operation | Typical Surface Finish (Ra) |
| Drilling | 3.2 – 12.5 μm |
| Boring | 0.8 – 3.2 μm |
| Reaming | 0.4 – 1.6 μm |
| Honing | 0.05-0.40 μm |
How Much Can Reaming Improve Hole Geometry?
A reamer smooths small irregularities left after drilling. It does not change the original hole location. If the drilled hole starts off-center, the reamer follows that same centerline. Because of this, machinists treat drilling and reaming as one operation rather than two separate processes.
| Hole Characteristic | Drilling | After Reaming |
| Diameter consistency | Medium | High |
| Roundness | Moderate | Better |
| Cylindricity | Moderate | Better |
| Surface texture | Visible feed marks | Uniform finish |
| Hole position | Set during drilling | Remains unchanged |
Common Reaming Problems and Practical Solutions
Even with the correct reamer, you may still see variations from one batch to another. In most shops, the problem is rarely caused by a single factor. Tool condition, hole preparation, machine setup, and cutting parameters all work together.
Before replacing the reamer, spend a few minutes checking the machining setup.
Hole Size Changes During Production
The first few holes are correct, but the later ones become larger. This is typically a sign of tool wear, rather than a programming problem. Also, you must measure spindle runout and the tool holder, as both can cause the hole to become larger as the job progresses.
Surface Finish Starts Looking Rough.
When circular marks, scratches, and torn surfaces appear, check the cutting edges and the delivery of coolant first. The tool may be in good condition, but the chips in the hole will leave marks.
The Reamer Feels Heavy While Cutting
When the spindle load changes suddenly, the reamer is likely to be removing more material than desired. Before changing the cutting parameters, measure the drilled hole. If the reamer doesn’t open the hole large enough, then it can overload the drill and shorten the hole’s life.
Hole Size Changes After Tool Replacement
Not all the time; installing a new reamer can resolve the issue. Even a new cutting tool can generate variation based upon the tool runout, holder accuracy, and machine alignment. A full inspection often serves as a quicker solution than replacing other tools.
Parts Pass Inspection but Do Not Assemble Easily
The measured diameter appears satisfactory, but the bearings, pins, and bushings still require more force to install. Where these occur, check the:
- Hole for burrs
- Rroundness
- Surface finish rather than repeat the diameter measurement.
What Design Considerations Should You Follow for Reamed Holes?
The recommendations below help you avoid common manufacturing issues before the part reaches the machine shop.
Leave Enough Stock for Reaming
As discussed before, a reamer removes a small amount of material instead of enlarging the hole significantly. If the drilled hole is too large, the reamer cannot produce the required finish. If too much material remains, cutting forces increase and tool wear becomes more noticeable.
Typical reaming allowance ranges from 0.10 mm to 0.50 mm. This usually depends on the hole diameter and intended material.
Avoid Blind Holes That Are Too Shallow
A reamer requires sufficient room to clear chips from the reamer edges and to enable it to make the reaming cut. If the blind holes are shallow, chips may be trapped in the blind hole. As a result, this will cause a bad surface finish and shorten the life of the tool. So, it is recommended to give extra clearance below the completed hole if possible.
Add a Chamfer at the Hole Entrance
A small chamfer will help guide the reamer into the hole and minimize the risk of damaging cutting edges when entering the hole. Also, it eliminates sharp edges that might get in the way of assembly.
For many standard uses, a chamfer of 45° x 0.5 can be used.
Keep the Hole Axis Accessible
Reaming can become difficult if the overhang is long, if there are close walls, and deep pockets. Allow sufficient clearance around the hole for unrestricted entry of the tool holder and spindle. It is particularly useful for multi-axis machining and deep parts.
Get Expert Support for Precision Reamed Components
At YD Rapid, our engineering team reviews your drawings before production starts. We check hole tolerances, material selection, machining feasibility, and process planning to identify potential manufacturing issues early.
If we see a chance to simplify machining and improve production, we’ll discuss it beforehand with you before machining begins.
Whether you need prototype parts, low-volume production, or large manufacturing runs, we provide CNC reaming services with dimensional inspection and quality checks based on your drawing requirements.
Upload your CAD model or engineering drawing today. Our engineers will review your project, provide practical manufacturing feedback, and prepare a detailed quotation based on your specifications.

Frequently Asked Questions
How much material should be left before reaming?
A reamer removes only a small amount of material to improve hole size and surface quality. For most CNC machining operations, leaving 0.10 mm to 0.50 mm of stock works well, depending on the hole diameter and workpiece material. Too little stock reduces cutting action, whereas too much stock increases cutting forces and tool wear.
Which reamer should I choose for my part?
The selection depends on the hole type, workpiece material, production volume, and required hole quality. Hand reamers are suitable for manual finishing. While machine reamers are used in CNC machining. Straight-flute reamers perform well in through holes, and spiral-flute reamers are commonly selected for blind holes to improve chip evacuation.
Can one reamer machine different materials?
A single reamer can machine different materials, although the cutting parameters should change for each material. Aluminum, stainless steel, carbon steel, titanium, and engineering plastics generate different cutting forces and chip formation.
Does reaming improve every drilled hole?
Reaming improves the hole finish and final diameter. Although it does not correct drilling errors. The drilled hole should already have the correct position, alignment, and machining allowance before the finishing operation begins. A properly prepared hole allows the reamer to produce the expected results.
What information should I include in my RFQ for reamed holes?
You can include the finished hole diameter, tolerance, hole depth, material, quantity, and drawing revision. If the hole is intended for a bearing, dowel pin, bushing, or some other fitted component, mention that in the drawing or RFQ. These details help our engineers select suitable tooling, machining parameters, and inspection methods before production starts.