CNC Surface finish affects whether your CNC part works or fails. It changes friction, sealing, wear, and corrosion resistance. This guide covers how finish is measured, what the common finish types are, how cost is affected, and how to write finish correctly on your drawings.
What Is CNC Surface Finish?
Roughness, Waviness, and Lay
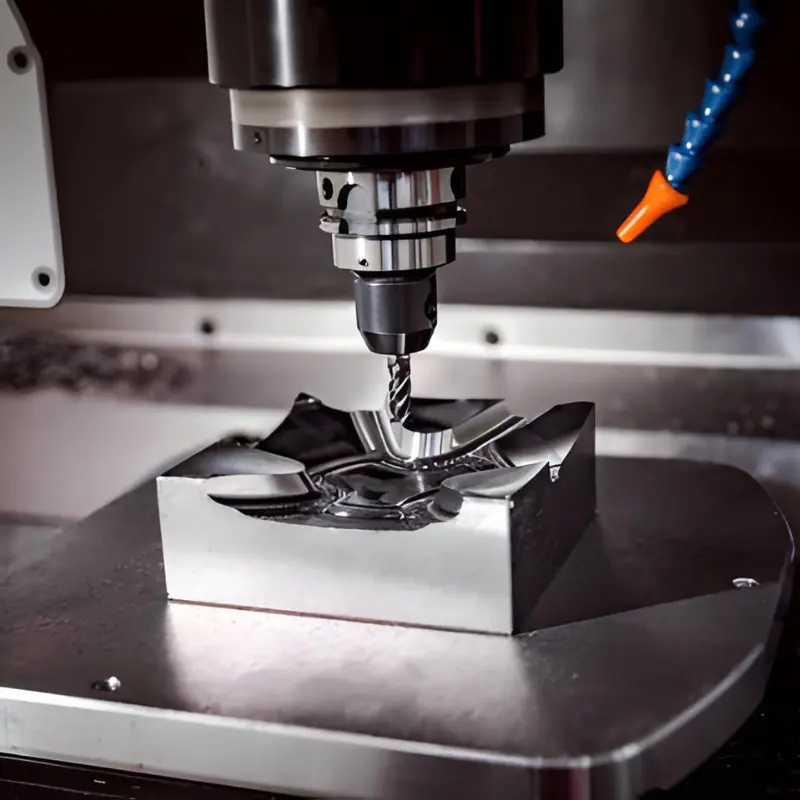
When a cutting tool moves across metal, it leaves a texture behind. You usually cannot see it with the naked eye, but it is there.
Surface finish describes three things about that texture:
- Roughness
- Waviness
- Lay
Roughness is what engineers measure and specify most often. Waviness matters for precision fits. Lay matters when the direction of friction or fluid flow is important.
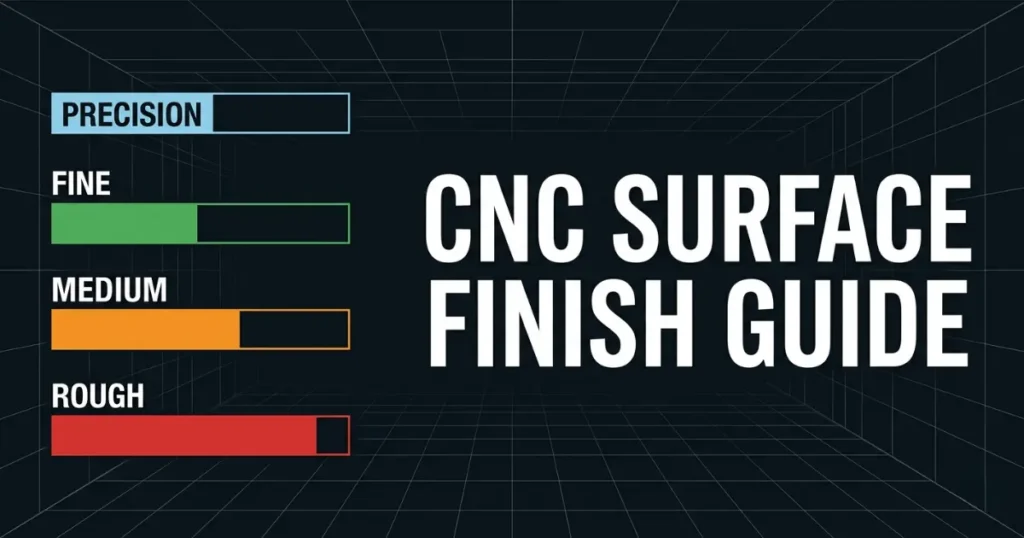
Surface Finish Chart
Why Surface Finish Is Not Just About Looks
Here is what the wrong finish actually causes:
- Leaks
- Early wear
- Cracking
- Coating failure
Surface finish is a functional requirement. Looks are secondary.
How Surface Finish Is Created During Machining
CNC surface finishing depends on three things:
- Feed rate
- Tool geometry
- Cutting speed
CNC milling generally gives Ra 1.6 to 3.2 µm. CNC turning gives Ra 0.8 to 1.6 µm.
Following machining, the part may undergo secondary operations such as anodizing, bead blasting or polishing. The as-machined finish is not the final finishing of any part.
Ra, Rz, and Other Roughness Parameters
What Ra Means
Ra stands for Roughness Average. It is the average height of all surface irregularities across a measured length.
Ra is expressed in two units:
- µm — used in Europe and Asia
- µin — used in the USA
They measure the same thing. 1 µm = 39.37 µin.
Ra 3.2 µm is the default finish of most CNC machining services. This is what you will be given unless you specify anything on your drawing. In the case of turned parts, the default is generally Ra 1.6 µm.
Ra is popular as it is easy to compute, easy to measure, and suitable for most applications.
Why Ra Alone Is Not Always Enough
Ra is an average. Averages hide extremes.
Two surfaces may have equal Ra values yet act in a very different manner. There are a couple of sharp and tall marks with shallow spaces between them. Another could be smooth, curvy forms. Same Ra number. Very different performance.
So engineers also use:
- Rz
- Rt
- Rq
A practical rule: use Ra for general machined surfaces. You will use Rz where the part must seal against a gasket or O-ring, and Rt as hard a rejection limit as you can have in your QC process.
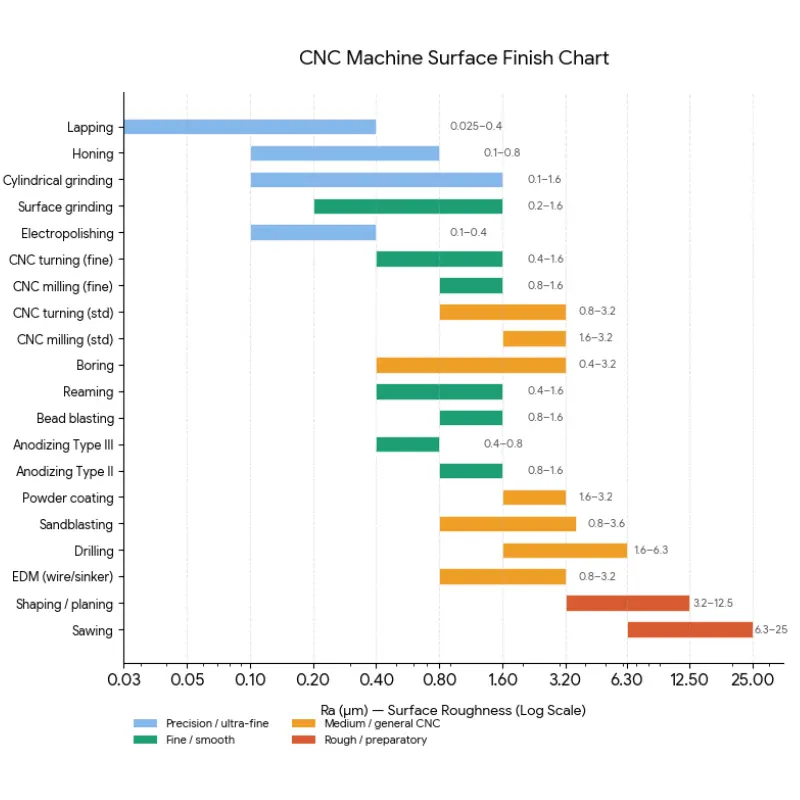
How Surface Roughness Is Measured
There are three common methods for surface roughnss measurement in CNC machining:
- Contact profilometer
A diamond stylus is dragged across the surface and measures vertical motion. Quick, precise, and it works with most metals. The tool automatically calculates Ra, Rz, and similar values.
- Optical methods
Non-contact. Uses light or laser scanning. Suitable for soft materials, coated surfaces, or parts where a stylus may be damaging. More expensive.
- Comparison charts
A physical reference block with known Ra values. The machinist compares the feel between the part and the reference block. Fast and cheap. Not precise, but useful for quick checks on the shop floor.
Table 1: Surface Roughness Levels
| Ra (µm) | Ra (µin) | N Grade | Typical Application | Relative Cost |
| 0.2 | 8 | N3 | Optical lenses, mirror-polish medical | Very high |
| 0.4 | 16 | N4 | Precision bearings, aerospace seals | High |
| 0.8 | 32 | N5 | Automotive, consumer electronics | Medium-high |
| 1.6 | 63 | N6 | Precision mating surfaces, turned parts | Medium |
| 3.2 | 125 | N7 | General CNC milling | Low |
| 6.3 | 250 | N8 | Structural faces, non-critical areas | Very low |
6 Most Common CNC Surface Finish Types
What Each Surface Finish Type Is
As-machined
As machined finish means the part comes out of the machine without any finishing. No additional processing. Tool marks can be seen. Milling and turning have a typical 1.6 to 3.2 µm and 0.8 to 1.6 µm, respectively. The lowest cost and quite sufficient when used as internal structural components.
Anodizing (Type II and Type III)
Anodizing is an electrochemical process. It deposits an oxide layer of aluminum on the surface. Type II provides resistance to corrosion and permits the use of color dyes. Type III is thinner and far less pliable and is utilized in parts that face wear, such as pistons, valves, and moving surfaces.
Powder coating
The dry polymer powder is applied electrostatically to the metal and then cured in an oven at approximately 200 °C. The outcome is a hard, impact resistant coating that comes in virtually any color. The layer thickness ranges from 18 to 100 mm. It is relevant for tight-tolerance parts.
Bead blasting
Glass beads are shot onto the surface under air pressure. It yields a smooth matte or satin feel that conceals toolwork. Ra generally goes from 3.2 µm down to 0.8 to 1.6 µm. It also introduces light compressive stress on the surface, which may enhance fatigue life.
Sandblasting
It is like bead blasting except that the abrasive used is sharper. Applied to provide a surface onto which the coating will be applied. It forms a coarse anchor profile to allow the coating to bond. It does not come as a standalone finish.
Polishing and electropolishing
Progressively finer abrasives are used in mechanical polishing to achieve a Ra of 0.1-0.4 µm. Electropolishing is an electrochemical process applied to stainless steel. It takes away a thin layer of metal, smoothing the surface and passivating it in the process. The outcome is sterile, easy to clean, and corrosion resistant. Widespread in the health care and food industries.
Why Each Surface Finish important?
Each finish solves a specific problem:
As-machined
Choose this when you have zero budget for extra work. It leaves visible tool marks, so only use it if the look of the part is not important.
Anodizing
This is the best choice for aluminum parts. It adds a hard layer that stops rust, and you can add colors like red, blue, or black.
Powder coating
It makes any metal very tough. It creates a thick, colored skin that resists scratches and heavy impacts better than paint.
Bead blasting
It sprays the part with tiny beads to create a smooth, matte look. It is often done right before anodizing.
Polishing
It is important for tools used in medicine and food. Making the surface perfectly shiny and smooth prevents bacteria to stuck in the small cracks.
How Each Finish Is Applied
| Finish | Process Summary |
| As-machined | Direct from CNC — no additional step. |
| Anodizing | Immerse in sulphuric acid bath and apply DC current. Oxide grows into and out of the surface equally. |
| Powder coat | Electrostatic gun applies dry powder, then cures in an oven at ~200°C. |
| Bead blasting | Compressed air drives glass beads at the part surface inside a sealed cabinet. |
| Sandblasting | Same as bead blasting, but with angular abrasive media for the anchor profile. |
| Polishing | Multi-stage abrasive belts, pads, and compounds in sequence. |
| Electropolishing | Immerse in electrolyte with reverse current — removes surface material evenly. |
Table 2: CNC Surface Finish Chart Comparison
| Finish Type | Best Material | Ra Range | Cost Tier | Key Advantage | Main Limitation |
| As-machined | All | 1.6 to 3.2 µm | Low | No extra cost or lead time | Visible tool marks |
| Bead blasting | Metal, hard plastic | 0.8 to 1.6 µm | Low | Uniform matte, hides marks | Operator-dependent result |
| Anodizing Type II | Aluminium, titanium | 0.8 to 1.6 µm | Medium | Corrosion resistance and colour | Al/Ti only; adds ~50 µm |
| Anodizing Type III | Aluminium | 0.4 to 0.8 µm | Medium-high | Hardest wear resistance | Limited colour |
| Powder coating | Any metal | 1.6 to 3.2 µm | Medium | Impact resistance, wide colours | Thick layer |
| Sandblasting | Most metals | 0.3 to 3.6 µm | Low | Prep for coating adhesion | Not a standalone finish |
| Polishing | Metals, plastics | 0.1 to 0.4 µm | High | Mirror finish, medical-grade | Cost and time intensive |
| Electropolishing | Stainless steel | 0.1 to 0.4 µm | High | Sterile, food-safe surface | Stainless and nickel alloys only |
Why Choosing the Wrong Finish Costs More
What are two surface finishing mistakes?
Over-specification
You ask for a finish that is tighter or more complex than the part needs. The part works fine, but you paid more than necessary.
Under-specification
You ask for a finish that is not tight enough, or you leave it unspecified. The part looks fine, but fails in use.
Both cost money. For example, one will waste it on manufacturing. The other wastes it on effort, warranty claims, and downtime.
What Happens When You Tighten Ra
When you tighten the Ra requirement, the machinist must:
- Slow the feed rate
- Take extra finishing passes
- Use finer, faster-wearing tools
- Check more carefully
Each of these steps add time and cost. Going from Ra 3.2 to Ra 1.6 is manageable. Going from Ra 1.6 to Ra 0.4 can triple cycle time and require grinding instead of milling.
On the other side: a sealing surface left at Ra 3.2 µm will leak. A bearing bore that is too rough will wear its mating shaft quickly. A fatigue-sensitive part with a rough surface will crack earlier than expected.
How Coating Thickness Affects Tolerances
When you anodize a part, the oxide layer grows equally into and out of the aluminum surface. So a 25 µm anodize adds 12.5 µm to each side of the part. This is the 50/50 rule. If your bore is tolerance-critical, you must machine it 12.5 µm oversize before anodizing.
Powder coating is less predictable. For example, it adds 18 to 72 µm per side. If powder coat builds up on a threaded hole, the thread will not accept a bolt.
The fix is to highlight masking zones on your drawing. Threads, bearing seats, press-fit bores, and precision mating faces all need masking callouts.
How to Choose the Right Finish for Your Part
What questions to ask for right CNC surface finish?
Before you pick a finish, answer these in order:
- What does this surface need to do?
- What metal is the part made from?
- How tight are the dimensions near this surface?
- Where will the part be used?
Work through this list in order. You will usually have one or two real options left by the time you reach budget.
Why material is important in surface finishing?
Material is very important here.
- Anodizing only works on aluminum and titanium. You cannot anodize steel.
- Electropolishing is designed for stainless steel and nickel alloys. It does not work well on aluminum.
- Powder coating works on any metal that can withstand oven curing.
- Passivation is for stainless steel only.
- Plastics can be bead blasted and painted, but most chemical and electrochemical processes are not suitable.
How Environment Drives the Final Decision
- For outdoor use, anodizing Type II or powder coating is good. Bare aluminum corrodes quickly.
- For High wear, anodizing Type III is used. Much harder than Type II.
- For High temperature parts, powder coat is not suitable.
- Electropolishing or passivation on stainless steel is good for food contact parts
- For indoor parts, as-machined or bead blast is usually enough.
Best Surface Finish for Aluminum
What Makes Aluminum Different
Aluminum naturally creates a thin skin. This layer is naturally strong and thick.
However, not all aluminum behaves the same. The alloy changes how the surface responds:
- 6061-T6 anodizes cleanly and accepts dye well
- 7075 anodizes but takes dye poorly. For example, color consistency is harder to achieve
- Die-cast aluminum anodizes inconsistently and is not recommended for Type III hardcoat
- 2024 is difficult to anodize and prone to pitting
If color consistency is important for you and you want to machine the same product in bulk, it is recommended to specify the alloy and request material from the same batch.
Why Anodizing Is Standard Finishing for Aluminum
Anodizing is not a layer of paint. It grows directly out of the metal surface. Half of the new layer grows into the aluminum, and the other half grows outward. Because it is part of the metal, it will not peel or make flakes.
This process makes the part slightly thicker. If you plan for this growth during machining, your parts will fit together perfectly.
There are two main types of anodizing:
- Type II: Adds color and stops the metal from rusting.
- Type III (Hardcoat): Makes the surface very hard.
Anodizing vs Powder Coating for Aluminum
| Requirement | Choose |
| Tight dimensional tolerances | Anodizing |
| Bold color, many color options | Powder coat |
| Maximum wear resistance | Anodizing Type III |
| Impact resistance on the coating | Powder coat |
| Lightweight decorative finish | Anodizing Type II |
| Part has threads or precision bores | Anodizing |
How Surface Finish Affects Cost and Lead Time
What Drives Finish Cost
Surface finish cost comes from four sources:
- Machining time
- Secondary processes
- Tooling
- Inspection
No need to do any extra step on simple parts. However, you will apply above four rules to a polished stainless steel medical part. It will carry a very smooth surface Ra 0.2 µm.
Why Tighter Ra Values Cost More
Going from Ra 3.2 to Ra 1.6 µm is a modest change. You slow the feed rate and perhaps take one extra finishing pass.
Going from Ra 1.6 to Ra 0.8 µm requires careful tool selection and optimized cutting parameters.
Going from Ra 0.8 to Ra 0.4 µm often means switching from milling to grinding. It is a completely different process, a different machine, different lead time.
Going below Ra 0.4 µm into lapping or superfinishing is another step change again.
Each time you halve the Ra value at the tight end of the range, you roughly double the time and cost.
How to Reduce Finish Costs Without Sacrificing Function
The most effective approach is zoned specification. It means you will apply tight finish requirements only to the surfaces that need them.
Instead of calling out Ra 0.8 µm across the entire part, specify:
- Ra 0.8 µm on sealing faces and bearing bores
- Ra 3.2 µm on all other surfaces
This alone can reduce finish costs by 30-50% for complex parts. The reason is that the machinist can use efficient parameters on most parts.
The best option is to talk to your supplier early in the design process. Tell them which parts should be perfect and which are not important. They can suggest ways to save money by only focusing on the surfaces that actually matter.
How to Specify Surface Finish on Drawings
What are machining finish symbols?
Urface texture symbols include:
- No machining symbol is √
- Machining needed symbol is ─ √
- Material Removal not Allowed Symbol ○ √
Lay Symbol Directions
— → parallel
| → perpendicular
X → crossed
M → multidirectional
C → circular
Surface finish is shown on drawings using a check-mark symbol (√) with the Ra value written above or beside it. Two main standards are used:
- ISO 1302
- ANSI/ASME Y14.36
If you are sending parts to another country, confirm their measurement standards. Misreading µm as µin is a common mistake.
Why Vague Callouts Cause Problems
Black finish tells the shop nothing useful. Both anodizing Type II and powder coating produce black surfaces — but:
- Anodizing Type II adds approximately 5 to 25 µm per side
- Powder coating adds 18 to 72 µm per side
On a precision bore with a tolerance of ±0.05 mm, the difference between these two processes could put the part outside tolerance. The shop will choose whichever is easier or cheaper for them. The part may arrive looking correct and still fail to assemble.
The same problem applies to callouts like “smooth finish,” “polished,” or “deburr and clean.” Every supplier interprets these differently.
How to Write a Complete Surface Finish Callout
A complete callout includes:
- Parameter
- Value
- Scope
- Masking
Example note on a drawing: “Anodize Type II per MIL-A-8625. All external surfaces. Mask threads M8×1.25 and bore Ø25H7 — no coating in these zones.”
This eliminates ambiguity, protects your critical dimensions, and gives the shop exactly what they need to quote and produce the part correctly.
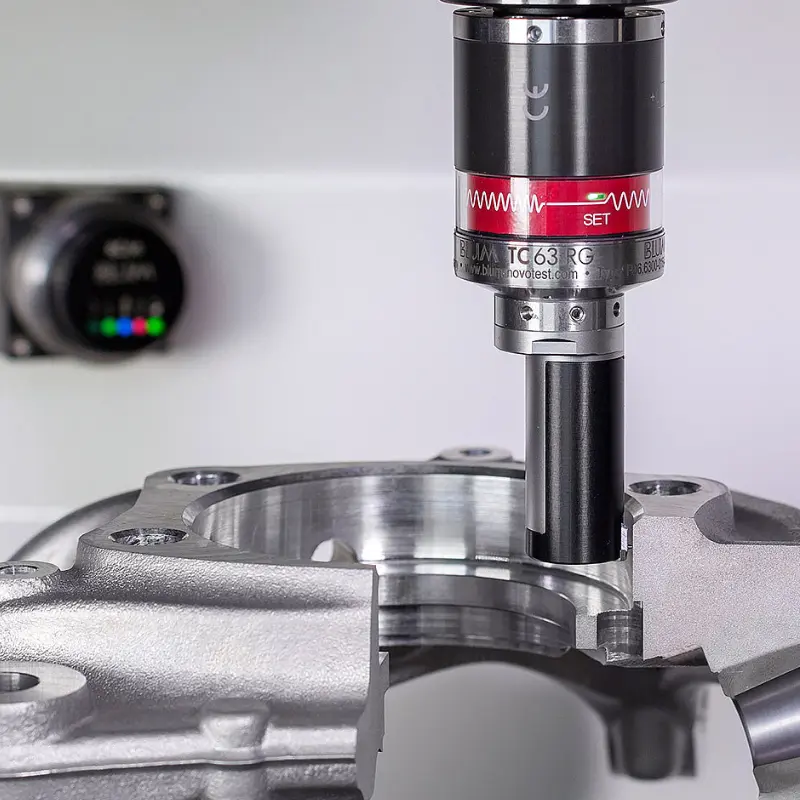
How CNC Shops Verify Surface Finish Quality
What a Proper Quality Process Looks Like
A capable CNC machining supplier does not just machine the part and ship it. They run a defined process around surface finish:
- Drawing review
- Process planning
- First-article inspection
- In-process monitoring
If any of these steps are skipped, the first sign of a problem is usually a rejected batch at your incoming inspection.
Why Supplier Capability Matching Matters
Not every shop can achieve every finish. A job shop with standard 3-axis mills can reliably produce Ra 1.6 to 3.2 µm. Ra 0.4 µm requires grinding capability. Ra 0.2 µm with electropolishing requires a specialist.
Sending a medical part to a regular machine shop often causes delays. The reason is that generally try to meet your high standards but fail. So they will ship bad parts and will ask you to accept lower quality. Therefore, the best suggestion is to use a shop that specializes in precision work.
Ask your supplier directly: “What is the best Ra value you can reliably hold in-house for this material?” A good supplier will give you a straight answer and tell you when they need to subcontract a step.
How a Shop Validates Finish Before and During Production
Validation uses a combination of methods:
- Profilometer measurement at the first article and at defined intervals in the production run
- Comparison to reference standards for quick in-process checks on standard finishes
- Dimensional check after coating to confirm that post-processing did not move the part outside tolerance
- Review of masking zones — visual and dimensional confirmation that protected areas are clean
Ask your supplier to include profilometer reports in their first-article documentation. If they cannot provide this, they are not actually verifying the finish.
Summary
Use Ra for general surfaces, Rz for sealing faces. Select the CNC surface finish by parameter and value. Use a tight finish only where you need to add a particular function. Tailor your finish process to your material and environment. Do business with a supplier who can demonstrate what he offers.
FAQ
- What is the best surface finish for aluminum CNC parts?
Most applications Type II anodizing – corrosion resistance, color, and dimensional control. Type III (hardcoat) to use on wear surfaces. Powder coat when bold color and impact resistance and tolerances are not tight.
- What is the standard surface finish for CNC machining?
The default of CNC milling is Ra 3.2 µm. The standard of CNC turning is Ra 1.6 µm. If you do not write a finish on your drawing, these are what you will get.
- What is the difference between bead blasting and sandblasting?
Bead blasting is a technique that employs round glass beads to produce a smooth, even matte finish. It is a last minute surface treatment. Sandblasting is a process that involves angular abrasive to rough up the surface and form an anchor profile for coating. Sandblasting is set up, not a complete finish.
- Can all metals be anodized?
No. Anodizing can be used on aluminum and titanium. It cannot be used on steel, stainless steel, or copper. The anodization of high-silicon die-cast aluminum is not very good. Unless your part is aluminum or titanium, you require a different process.
- What surface finish is best for medical and food-grade CNC parts?
Electropolishing on stainless steel is the standard choice. It produces Ra 0.1 to 0.4 µm, passivates the surface, and removes contamination traps. Passivation alone is used when dimensional change must be minimal.
- How is surface finish measured in CNC machining?
A contact profilometer is the most common tool. It drags a tiny diamond tip over the surface to find bumps. The machine then calculates the smoothness for you. If a part is very soft, use an optical tool. These use light so they do not scratch the surface. For a fast check, use comparison charts.